One element that can make a printed invoice easier to read is to print every other detail line with a different background color or shade, so that it is easy to distinguish between the detail lines. This feature can be added very easily to CCRQInvoice form templates, as we will show you in this article.
Edit the Template
Run CCRQInvoice, select Forms, then Edit Order Forms. You will see the Edit Forms window. Note that you probably won’t see all of the forms that I show here – if this is your first time editing forms in CCRQInvoice you will only see the “Standard” form listed.
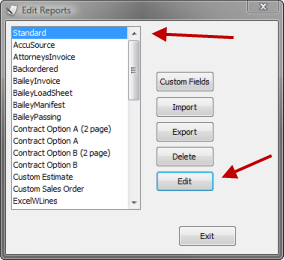
Click once on the “Standard” form (or any other form that you might want to change) and click the Edit button to open the form editor.
Add a Color Style
The CCRQInvoice form editor allows you to create a “style” object that defines a number of characteristics, such as background color and font. We will create a “style” that has a different background color, and set it up to be used on alternating detail lines in the detail band of the form.
Click once on the DetailInner band to select it, and look in the Property Grid window (usually at the lower right side of the screen. Find the Styles property, and click on the ellipsis (…) on the right.

This opens the Style Editor window. Click the green plus sign in the upper left to add a style, change the name property for the style to something that makes sense to you, and find the background color property.
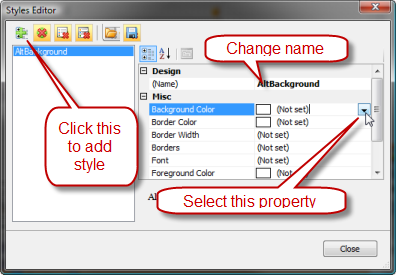
The dropdown list for colors lets you pick the color in several different ways. I usually use the “Web” tab, which shows a number of colors by name. You can use any option that you wish. For this example, I picked “BurlyWood” from the web tab. The Styles Editor will show you a sample.
Close the Style Editor
Applying the Style
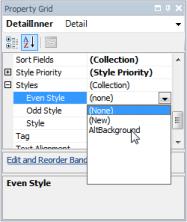
Now we need to apply the style to the DetailInner band. The Styles property has several components – if you click the plus (+) by Styles you will see that there are several options; Odd, Even and Style. Since we want every other detail line to have the background color, select Even and pick your newly created style from the dropdown list.
That’s all you have to do! Save your edited form (File then Save As) and exit the editor. Your new form will appear on the for list. Close the Edit Reports window.
Viewing the Results
Select Order Processing, load some orders, click the Printing tab, and select your new form from the Form dropdown list.
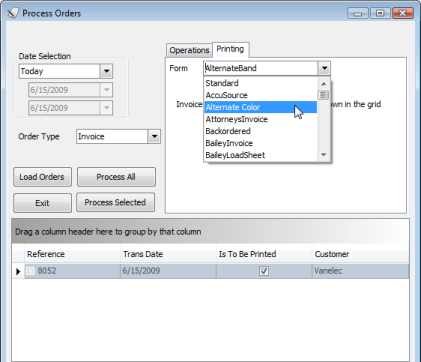
As you can see, our printed form now has a colored background for every other detail line in the form.
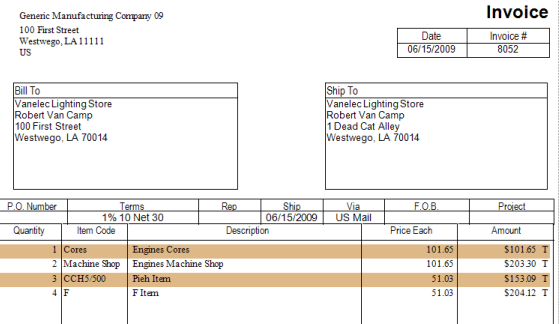
Note that this Style can be used for any object in the form. So you can use the same background color in other elements if you wish to set a theme for the form. You could use it to highlight the data, invoice number and addresses, if you wish.
One shortcoming to this is that the color bars will only print in the DetailInner band where you have a detail line printing. If you don’t have enough details to fill the page, the color bands will not show up in the empty section of the band.