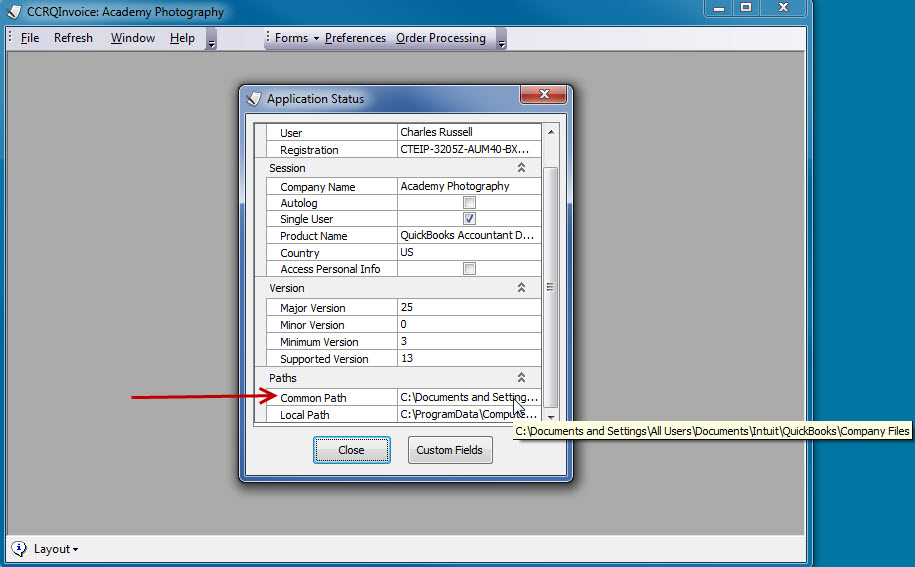
The first time that you install CCRQInvoice on a computer you will be asked to select a “Common Path” (sometimes referred to as a “Common Folder” or “Common Location”. CCRQInvoice will store your preference settings here, and any form templates that you modify.
Note, this applies to CCRQBOM as well
In a multi-user environment it is important that all users share the same location (hence the “common” name), so that all users can share the same preference settings AND share any form templates you create. Unfortunately, people often don’t choose the proper place when first installing the program.
This article will outline how to correct this problem.
Assuming that you have already installed the program and used it on a computer, run CCRQInvoice.
- Select Help in the main menu.
- Select Status.
- Scroll to the bottom of the Application Status window and look for the “Common Path” setting. You can see the value by either changing the window width, or holding the mouse cursor over the value.
Take note of this value. This is where you will find several files, including:
- CCRQ.XML (the preferences file)
- Possibly multiple files with a file type of “repx” (report templates that you have created).
Decide on a location that you want to use as the “common” location, that all CCRQInvoice users will share. This should NOT be on a local computer in a multi user situation – it should be on a file server. A useful location may be where your QuickBooks company file is stored. It is important that all users have read/write/create permission at this location. If they don’t, they may get an error when running CCRQInvoice (see this article for example).
Copy the CCRQ.XML file and all of the “repx” files to this new location.
Now you need to reset each user workstation to use the new location. On each computer:
- Select Help from the main menu.
- Select Tech Support.
- Select Reset Common Location.
- You will see a warning asking if you are sure that you want to do this. Click OK.
- The normal Program Setup dialog will open, as shown in the program documentation. Click Next and then in the folder dialog select the new location that you want to use (where you have already copied the CCRQ.XML and repx files).
- Click Finish.
- Exit CCRQInvoice. This is important, as it is still looking at the old location.
- Perform these steps on all other workstations that you have installed.
The next time you run CCRQInvoice on this computer it will use the new location
