Exporting a QuickBooks Assembly to Excel

CCRQBOM was not designed for file exports, but you can export a BOM to Excel with a little work. This article discusses how to export ALL of your BOM’s from QuickBooks for a “one-time” export, such as when you want to get your data OUT of QuickBooks and import it to ANOTHER inventory system.

Note that this requires a special version of CCRQBOM (4.0.0), which is available for $150.00. This release is ONLY supported for a one-time export. If you want this version, use our contact form to make a request.

Exporting BOM’s with CCRQBOM 4.0.0

If you purchase this product you will be given a link to download an installer. See our installation summary (PDF) document for general information about installing the software. Note that there are some differences from what you see in the PDF, particularly for the registration information. We will provide you with information, and a serial number, once you purchase the program.

Next, download BOMBOM Export Multiple Assys.repx.zip. This is a “zip” file, unzip it and save it to your computer system in a location you can easily find (such as your desktop).

Run CCRQBOM and select Forms and then Bill of Material.

In the Edit Reports window that opens, click the Import button.
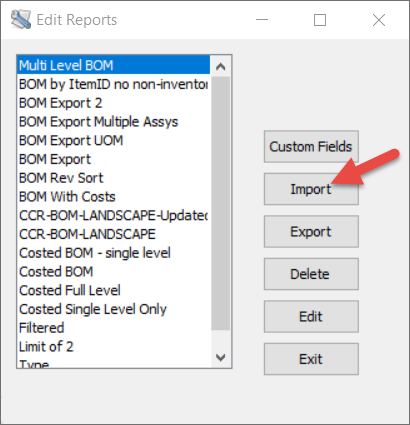
This will open a File Open dialog window. Use this to locate the downloaded “repx” file you saved earlier, select it, then click the Open button.
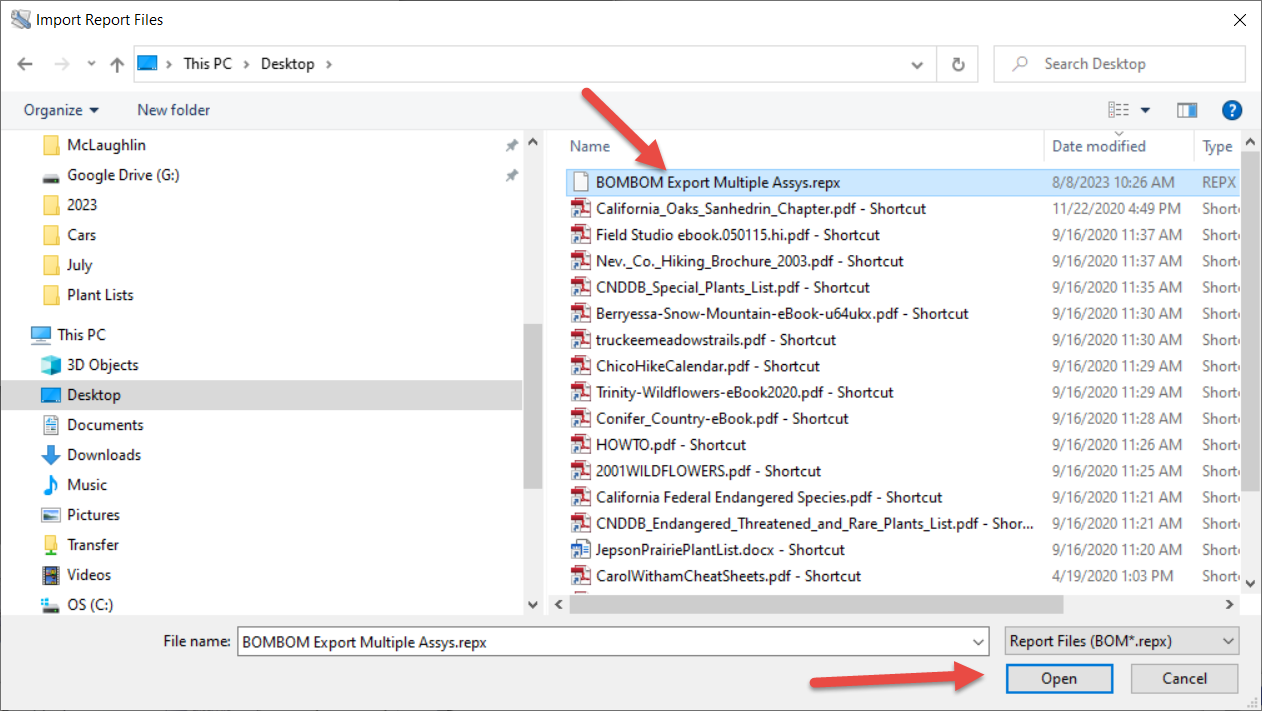
You will now see “BOM Export Multiple Assys” on the report list. Note that you won’t see all of the reports I shown in this example (this is from my test system).
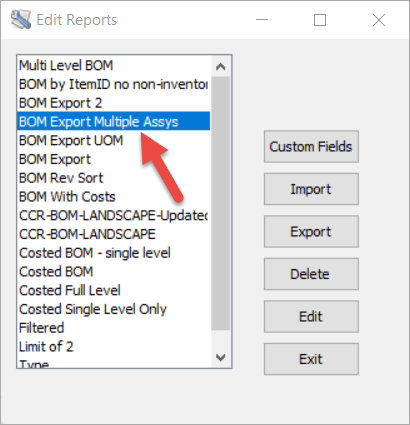
Click Exit to close this window.

Next:

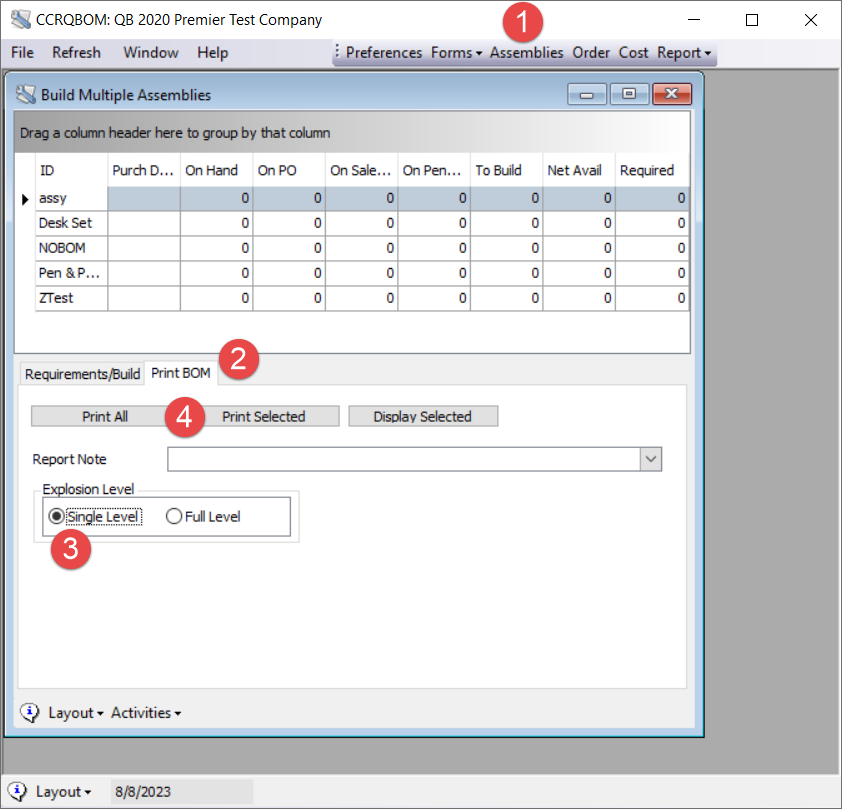
    1. Click the Assemblies menu selection
    2. Select the Print BOM tab
    3. Select the Single Level option (this is VERY important)
    4. Click Print All, unless you want to test this, in which case you can click on one assembly and click Print Selected
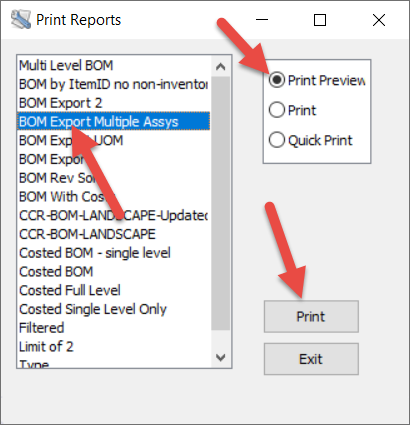
Print Reports dialog opens. In the report list, select “BOM Export Multiple Assys”. This is a stripped down report that removes a lot of unnecessary information (footers, page numbers, lines). Then select Print Preview and click the Print button. The other options will NOT do what you want.
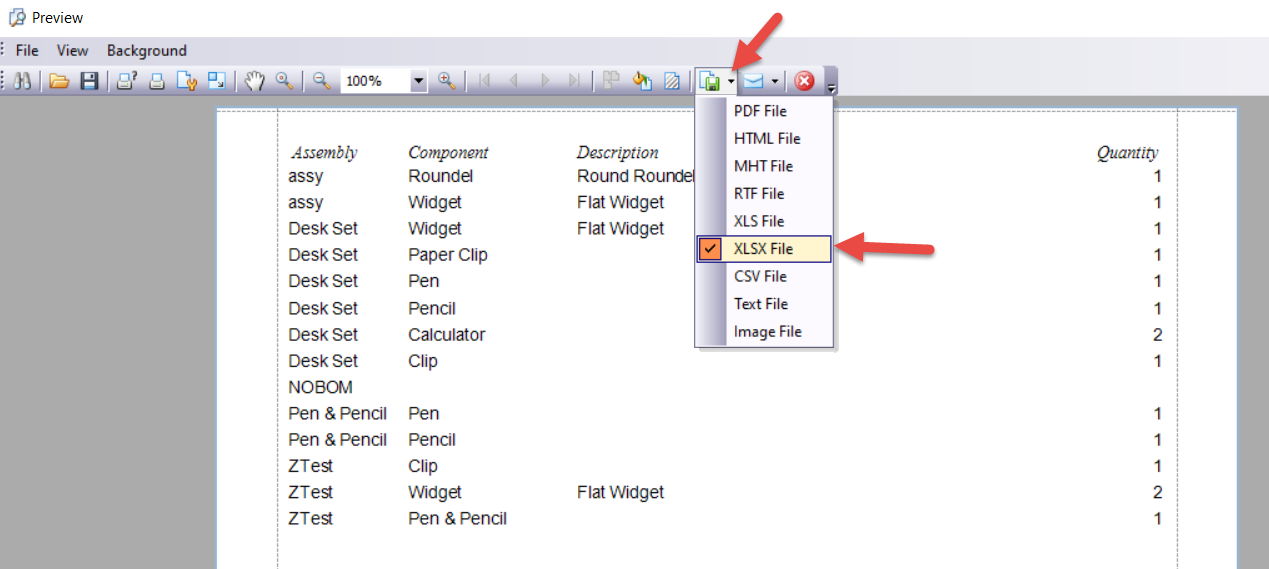
In the Preview window you will see the simplified export report, as shown here. Click the down arrow next to the green floppy disk icon to get the export dropdown menu. You can select “XLSX File”, or if you wish “XLS File” or “CSV File”, to export the report.
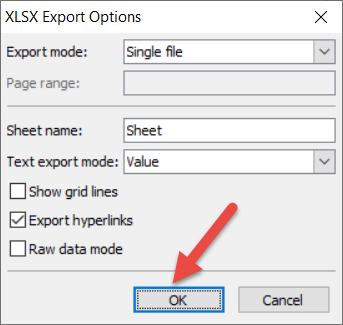
In the Export Options dialog (the appearance may vary depending on the options you chose) just click the OK button.
You will be asked for a location to save the exported file. You may also have an option to open the file immediately, if you have an appropriate version of Microsoft Excel installed.

Modifying Export

There are other fields in the BOM in addition to what this export includes. Note that some fields you may see in QuickBooks (particularly in the Enterprise version) may not be available to our product. You can modify the template to add other fields, but note that this is somewhat tricky and time consuming. You have to learn how to use our form editor. Information is in the program documentation. Feel free to ask for tips, and we can tell you if the field you want can be exported.
 

Adding Line Numbers to Order Forms

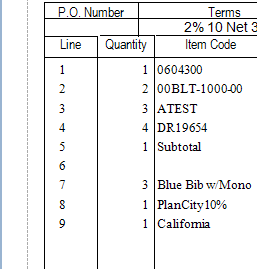
In CCRQInvoice open the report designer. I’ve inserted a new column in the DetailInner section for the line counter, and in the GroupHeaderInvoiceTop section for the column heading. I’ve added a Cross-band box and adjusted the boxes as is appropriate.

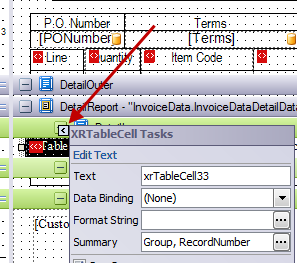
Click once on the new column that you have added and then click on the small “pip” that appears in the upper right corner.


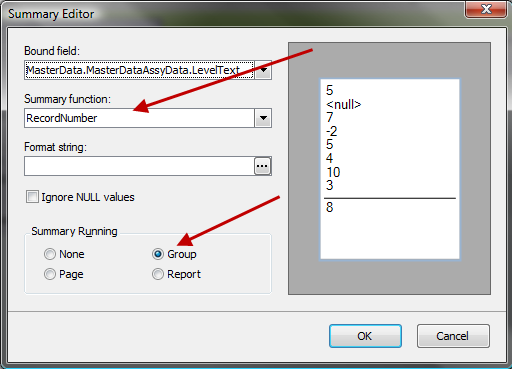
Click on the ellipsis (…) next to Summary to open the Summary Editor. In the Summary function line, select RecordNumber, which will be near the bottom of the list. For Summary Running select the Group option (note that the Bound field selection will be blank).


Save the modified report and give it a name. Here is a sample of what it should look like:


Alternating Color Bands for Forms

One element that can make a printed invoice easier to read is to print every other detail line with a different background color or shade, so that it is easy to distinguish between the detail lines. This feature can be added very easily to CCRQInvoice form templates, as we will show you in this article.

Edit the Template

Run CCRQInvoice, select Forms, then Edit Order Forms. You will see the Edit Forms window. Note that you probably won’t see all of the forms that I show here – if this is your first time editing forms in CCRQInvoice you will only see the “Standard” form listed.


Click once on the “Standard” form (or any other form that you might want to change) and click the Edit button to open the form editor.

Add a Color Style

The CCRQInvoice form editor allows you to create a “style” object that defines a number of characteristics, such as background color and font. We will create a “style” that has a different background color, and set it up to be used on alternating detail lines in the detail band of the form.

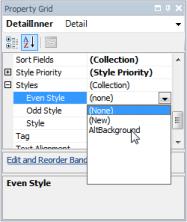
Click once on the DetailInner band to select it, and look in the Property Grid window (usually at the lower right side of the screen. Find the Styles property, and click on the ellipsis (…) on the right.


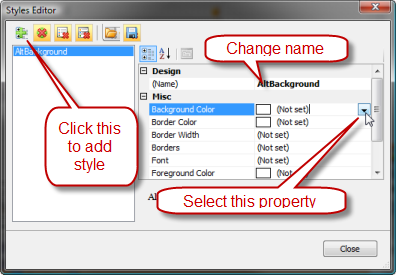
This opens the Style Editor window. Click the green plus sign in the upper left to add a style, change the name property for the style to something that makes sense to you, and find the background color property.


The dropdown list for colors lets you pick the color in several different ways. I usually use the “Web” tab, which shows a number of colors by name. You can use any option that you wish. For this example, I picked “BurlyWood” from the web tab. The Styles Editor will show you a sample.

Close the Style Editor

Applying the Style

Now we need to apply the style to the DetailInner band. The Styles property has several components – if you click the plus (+) by Styles you will see that there are several options; Odd, Even and Style. Since we want every other detail line to have the background color, select Even and pick your newly created style from the dropdown list.


That’s all you have to do! Save your edited form (File then Save As) and exit the editor. Your new form will appear on the for list. Close the Edit Reports window.

Viewing the Results

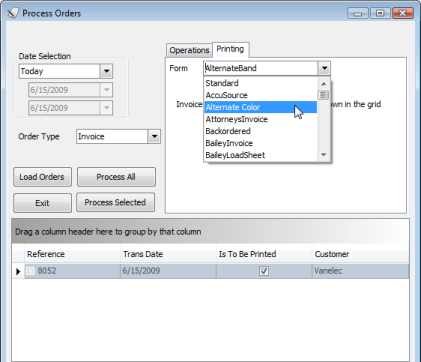
Select Order Processing, load some orders, click the Printing tab, and select your new form from the Form dropdown list.


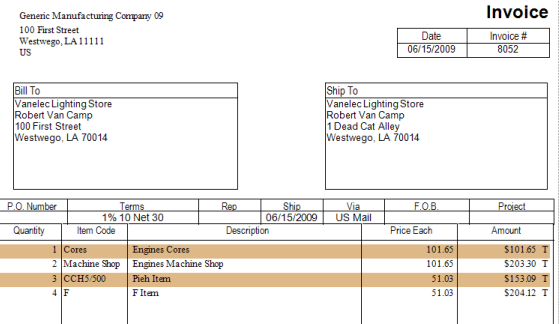
As you can see, our printed form now has a colored background for every other detail line in the form.


Note that this Style can be used for any object in the form. So you can use the same background color in other elements if you wish to set a theme for the form. You could use it to highlight the data, invoice number and addresses, if you wish.

One shortcoming to this is that the color bars will only print in the DetailInner band where you have a detail line printing. If you don’t have enough details to fill the page, the color bands will not show up in the empty section of the band.

Adding Your Logo to CCRQInvoice Forms

You can print your invoices, sales orders and estimates with CCRQInvoice . We provide a form editor that lets you design your own form. Here is a quick article on how to add your company logo to a custom invoice form.

  1. Select Forms from the main menu in CCRQInvoice, then Edit Order Forms.
  2. Highlight the form you want to work with – if you haven’t created your own form yet, the only option will be “Standard”. Click the Edit button to open the form editor.

  3. In the upper left corner of the standard form there is a “CompanyName” and “CompanyAddress” block. These are the company information from your QuickBooks company file. If your logo contains your address information, you may want to delete these. Otherwise, you will need to click on them and move/resized them to make room for your logo. In this example, I’ll remove the “CompanyName” (click on it, press the “delete” key) and rearrange the “CompanyAddress”.

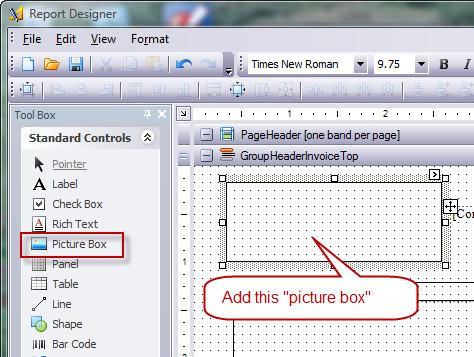
  4. Add a picture box control by clicking on the control in the tool box and dragging it to the form. Resize it to be the size you would like.

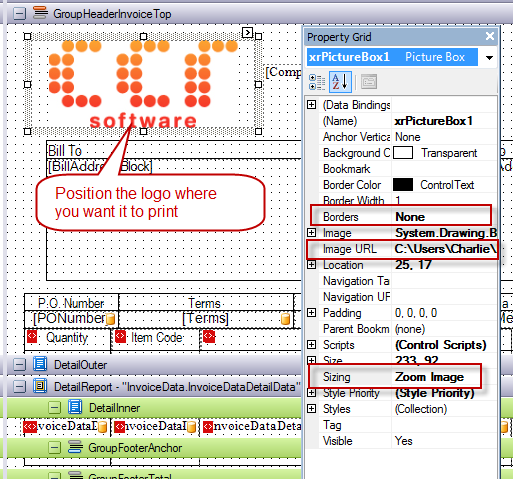
  5. Right click on the picture box and select Properties. A property grid box should open on the screen, usually on the right side. Change the following properties:
    1. Borders to “none”.
    2. Click on the Image URL option to get an ellipsis (…), click on that to open a file dialog. Locate a graphic file that contains your logo. This must be one of the typical Windows graphic files, such as a JPG, GIF, BMP or so forth.  When you locate a logo, it will display in the control, but it might not look right.
    3. Change the Sizing property to “Zoom Image” (there is a dropdown list of options)
    4. Resize the picture box to size the logo appropriately.
    5. Save the modified form – either with File/Save As (if you started with the “standard” form) or File/Save. Close the editor window

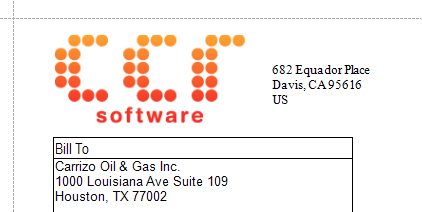
In the print preview we see that the logo has been added.


Your logo should appear on the form.

Adding Contract Pages to Invoices

QuickBooks has a page oriented form editor that you use to create your “templates” for invoices, sales orders and estimates. This approach places some limits on how you can design your form. This article talks about how you can use CCRQInvoice to add a contract page to the end of your order form.

A page oriented form editor lets you design the layout of the entire page. It is an easy to use method, you can see exactly what the form will look like. However, every page you print will have that same layout. There are two significant drawbacks to this in QuickBooks forms:

  • You cannot add a contract page to the end of the form. A disclaimer, terms of service or a contract, which you would like to have appended to the end of each order. If you try this with QuickBooks you can only have this information print on every page, and this takes up room from your order detail lines.
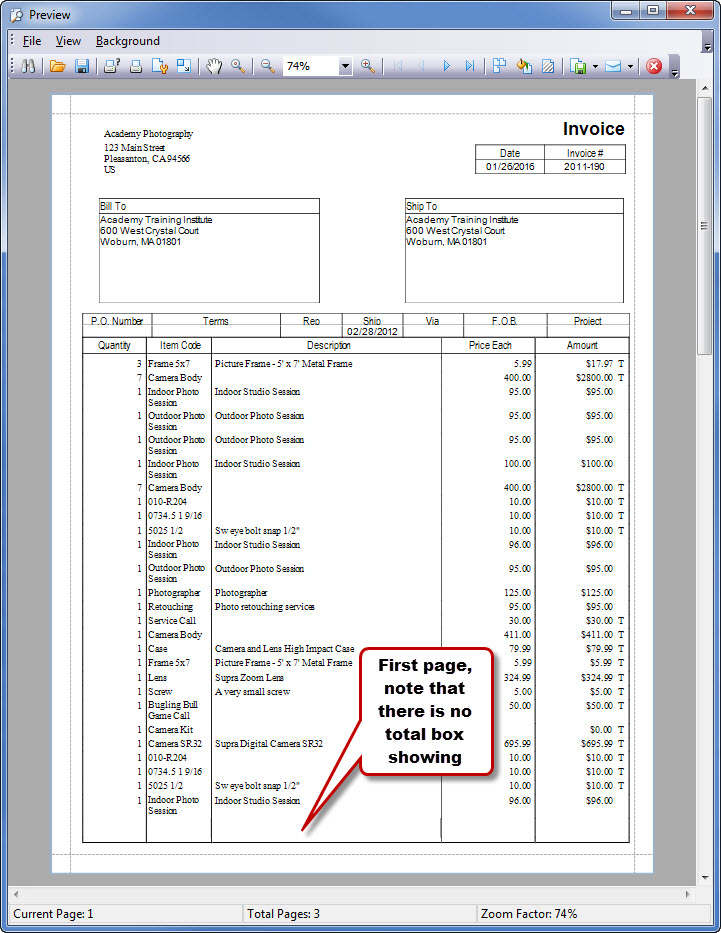
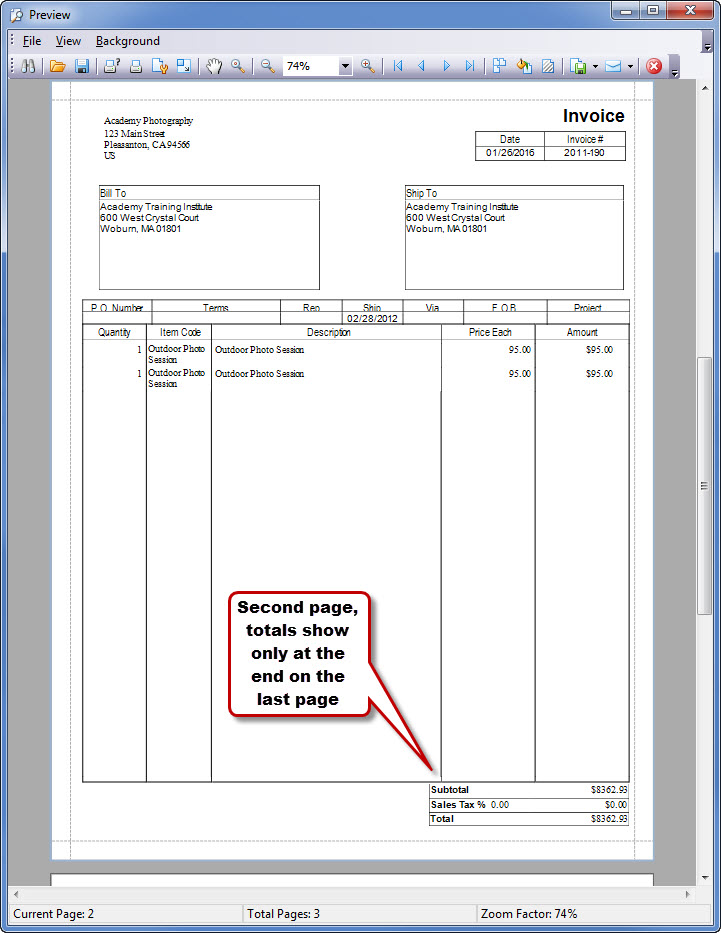
  • You cannot have a total section that only prints on the last page of a multiple page invoice. With QuickBooks the footer of each page will show the labels and boxes you set up for the totals, even though a value only shows on the last page.

CCRQInvoice can be used to print invoices, sales orders or estimates (which I collectively refer to as “orders” here) from your QuickBooks company file. It includes a more complicated form editor that is report oriented rather than page oriented. This includes the ability to format your form templates so that totals only print on the last page of a multiple page order, and to add contract pages to the end of the order. The drawback is – the CCRQInvoice form designer is more complicated to use than the simple page oriented form designer in QuickBooks.

As a side note – if you don’t want to take the time to learn how to use the CCRQInvoice form designer we can create a modified template for you for a very reasonable fee.

Sample Forms using CCRQInvoice

I have created four sample forms to use with CCRQInvoice to illustrate how to add contract pages (note that they also print totals only on the last page). Download the Contract Forms, which are in a zip file. Unzip them to any folder on your computer (your Desktop or My Documents folders are easy to use). Run CCRQInvoice, select the Forms menu, and the Edit Order Forms option. Select the Import button, locate the forms (they have a file type of repx) and they will be imported to your form library.

There are four samples:

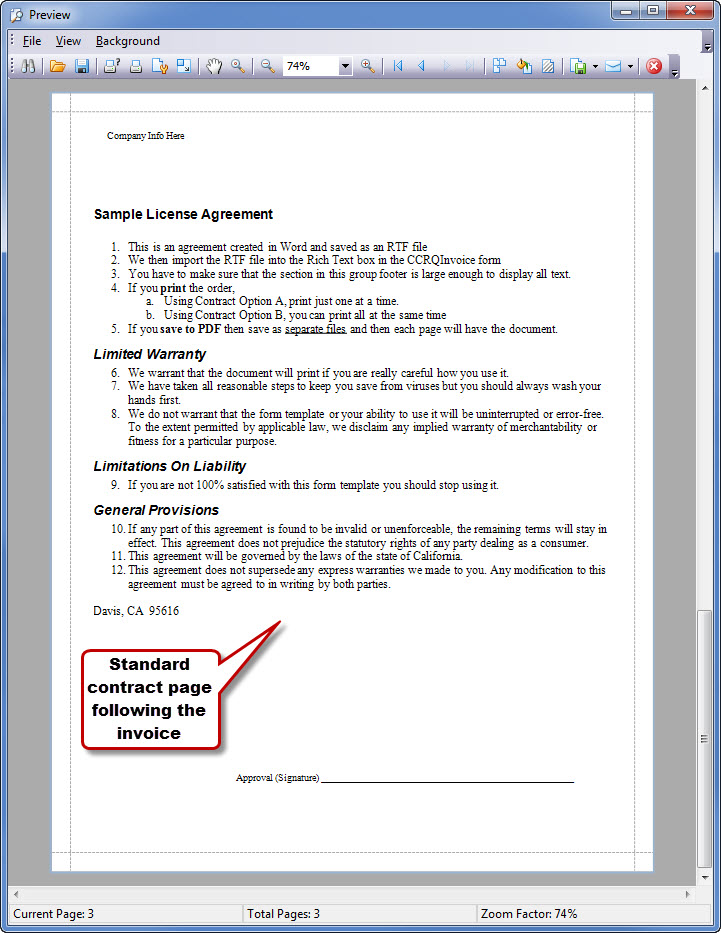
  • Contract Option A: This lets you prepare a full page contract, or any other text, that will print at the end of the order. The good points – you get a full page of text. The drawbacks – you can’t add any information (such as the order number) to that page, and you need to print them one at a time (not in a batch).
  • Contract Option A (2 page): A variation of the prior option that has more than one page of added text – a bit trickier to set up.
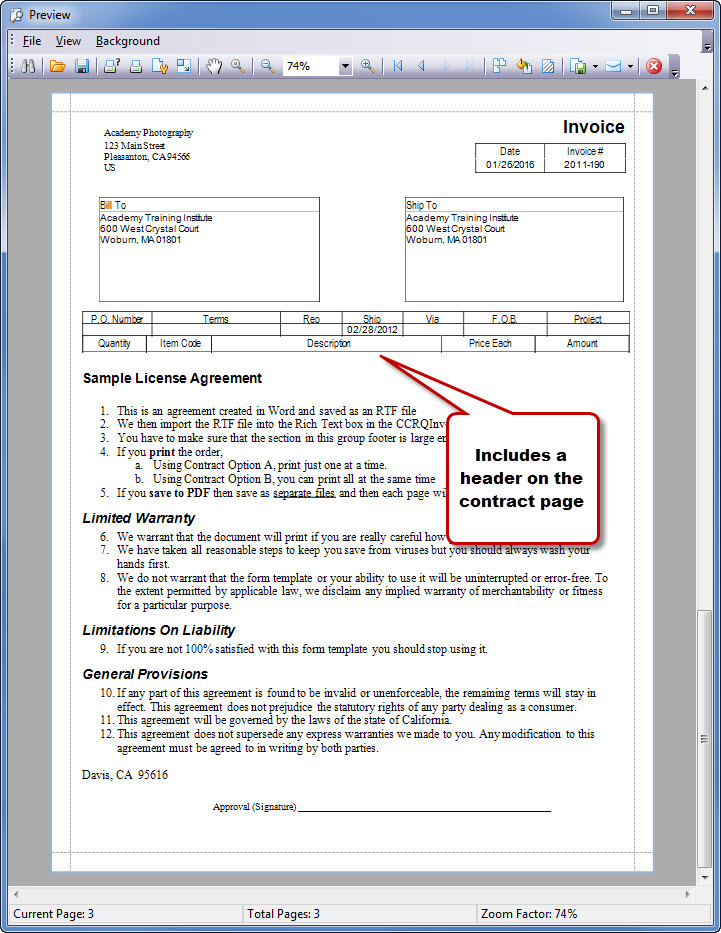
  • Contract Option B: Comparing this to Option A – the form header repeats on each page, so you have information such as the order number, date and so forth. You also can use this to print a batch of orders at one time. The disadvantage here is that you don’t get a full page of text.
  • Contract Option B (2 page): Same as Option B but with multiple pages of text.

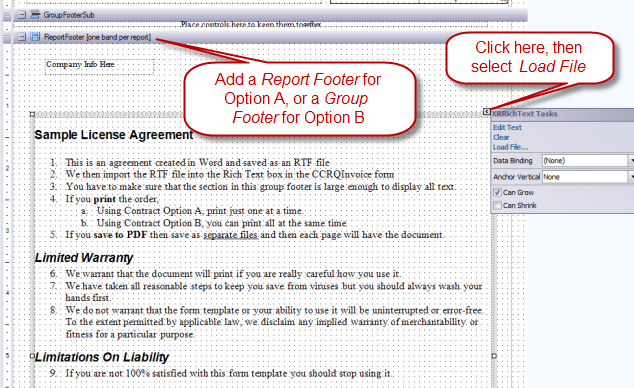
Let’s take a look at a sample invoice. This invoice has two pages of detail items, followed by a contract form. Note that you can create the contract form as an “RTF” file with Microsoft Word and import it to the order template.

Note that you can click on any image to see a larger version.

Here are the three pages using Option A:

The first page of a three page invoice using Option A
The second page of a three page invoice using Option A, note the totals
The third page of a three page invoice using Option A, showing the contract

Now let’s look at the third page if you used Option B. This allows you to have some invoice (order) information on the page, but you have less control over appearance and less room.

The third page of a three page invoice using Option B, note the header

Setting up these forms can be a bit complex – it is easier to take our sample and modify it to your needs. Better yet, let us create a form for you! Entering and editing the contract text is simple, however.